User Documentation
Overview
1. Create a Project
2. Create API Paths
3. Configure Path Actions
4. Test Drive Path Actions
5. Data Collections
6. Resources with Property Components
7. Error Responses
8. Query Parameters
9. Adding Script (Logic)
10. Webhooks
11. Documents
12. Versions
13. Share APIs
Overview
Start designing APIs by creating a project. Then proceed to define the API paths and responses. At any time, you can test drive API requests with any tool such as Curl, Postman or Hoppscotch.io. See the car icon for details on how to test or try the API. Documents can be run at any time and customized if needed.
On the left navigation, you'll see two sections. The design phase is no code using the UI to add paths, resources, error handling, etc. using our graphical UI. The Prototype sections enables database viewing and modifying, adding script and saving versions.
So lets get started creating a project and designing APIs !
1. Create A Project
Users get started by creating a project. A project can be a small API such as a microservice or a larger enterprise API, whichever works for the use case.
When creating a project, enter a name and description and click Create Project.
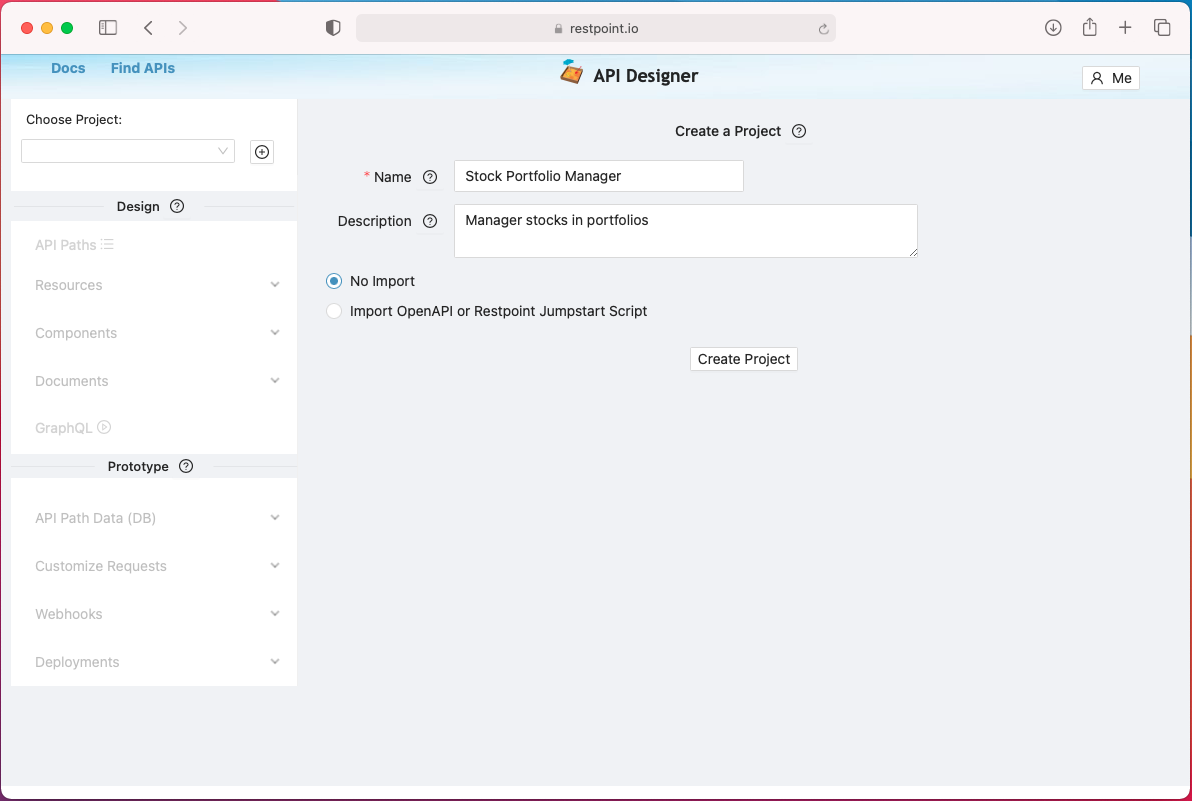
After the project was created, you'll see an empty page where you can start adding API paths.
2. Create API Paths
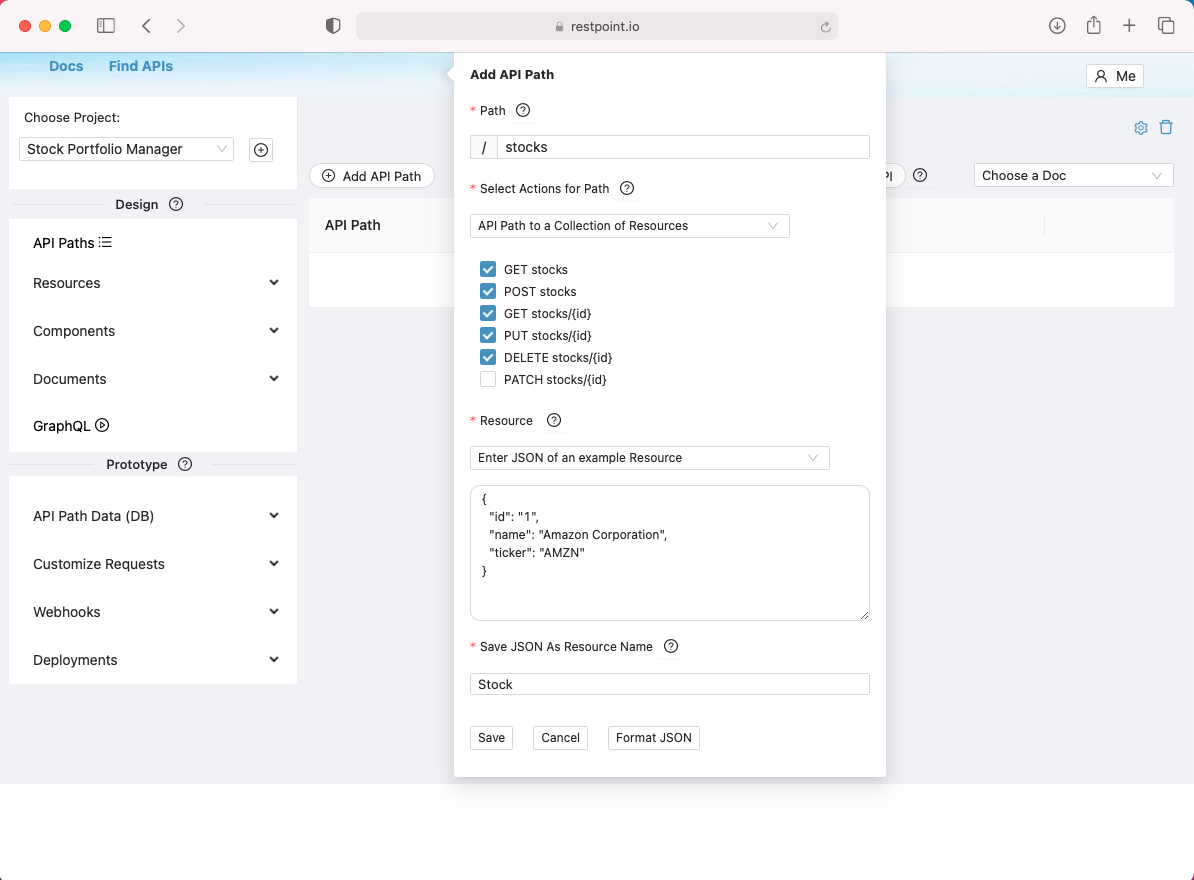
Create paths by clicking on the API Paths on the left navigation then see the Add API Path button. We will show how to create a path using an example. A window will pop up for you to add the path and with the convenience to select all the actions for that path.
API Paths Explained
Restpoint.io API Paths use the OpenAPI convention for naming paths, for example, the path /pets would represent a list of pets. For example, use GET pets/22 to find a pet with the id of 22. If we had a list of stores, we would create a path called /stores. Again, GET stores/2 would provide the details of store with id of 2.
API's provide a way to find structured data using nested paths. For example, if we wanted to find all the pets at store 2, we could send a request for GET /stores/2/pets and to find pet with id 15 would be /stores/2/pets/15. In Restpoint.io, create an API path /stores/{storeid}/pets to manage this data collection. Fo example, to add a pet to this collection, send the POST /stores/2/pets request.
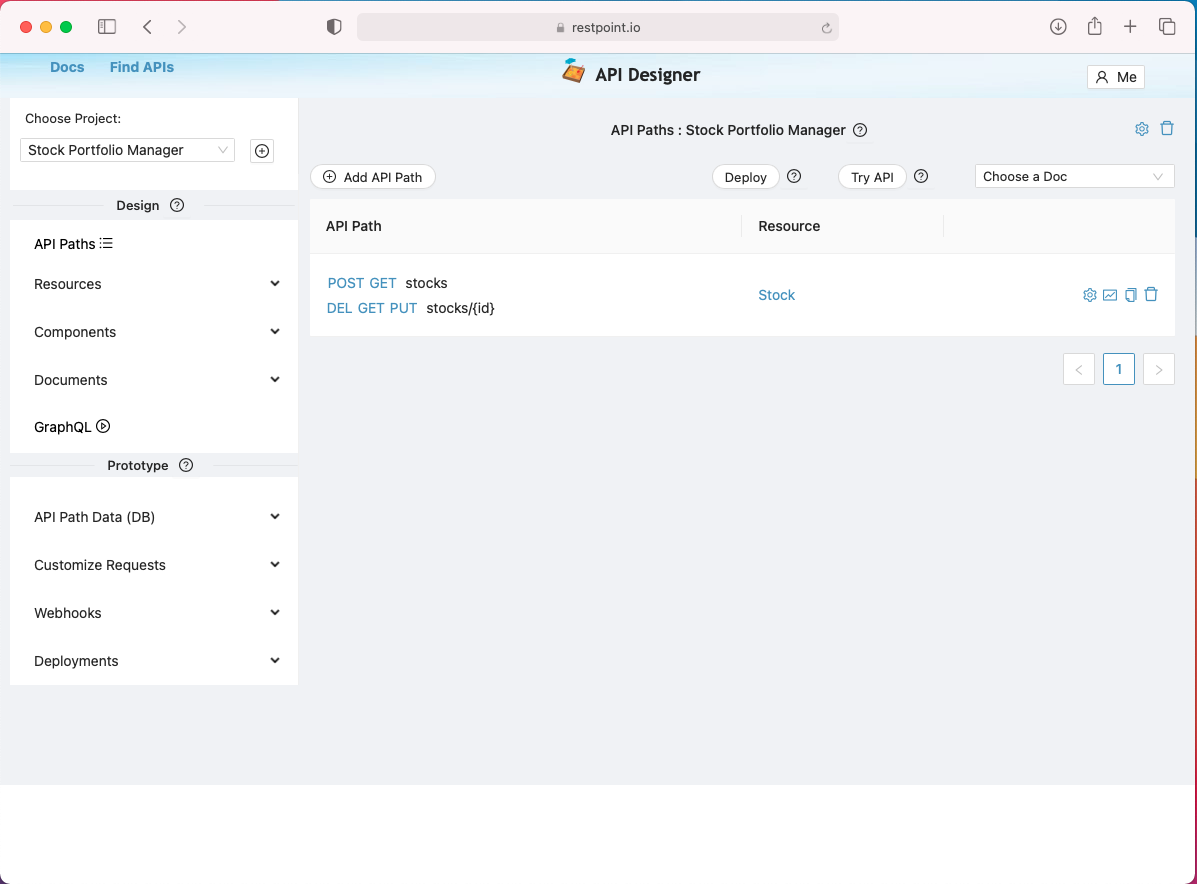
Click to expand the path, and you'll see the list of actions. See the screen icon for each of the actions to configure the response. Here you can hard code text or JSON, see the options in the dropdown.
After the path is created, the path URL will be shown a row in the table, click to expand and see the http actions.
3. Configure Path Actions
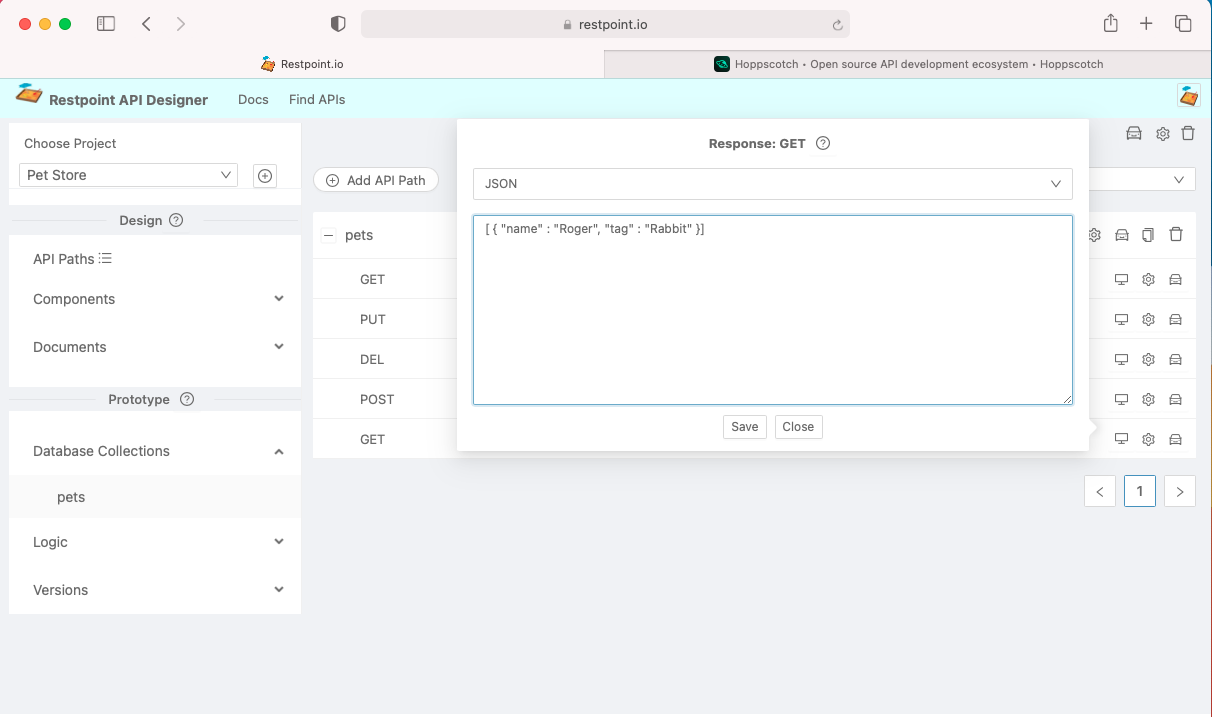
For each path action, look to the right and see a screen icon and gear icon. The screen icon is to configure the response, there are several options to configure a response including hard code JSON. The gear icon is to configure properties.
For example, to hard code a JSON response, click on the screen icon, select JSON and enter the JSON.
Choose any of the options in the select, and add the appropriate content. Note, for PDF, you simple add HTML content and PDF will be generated.
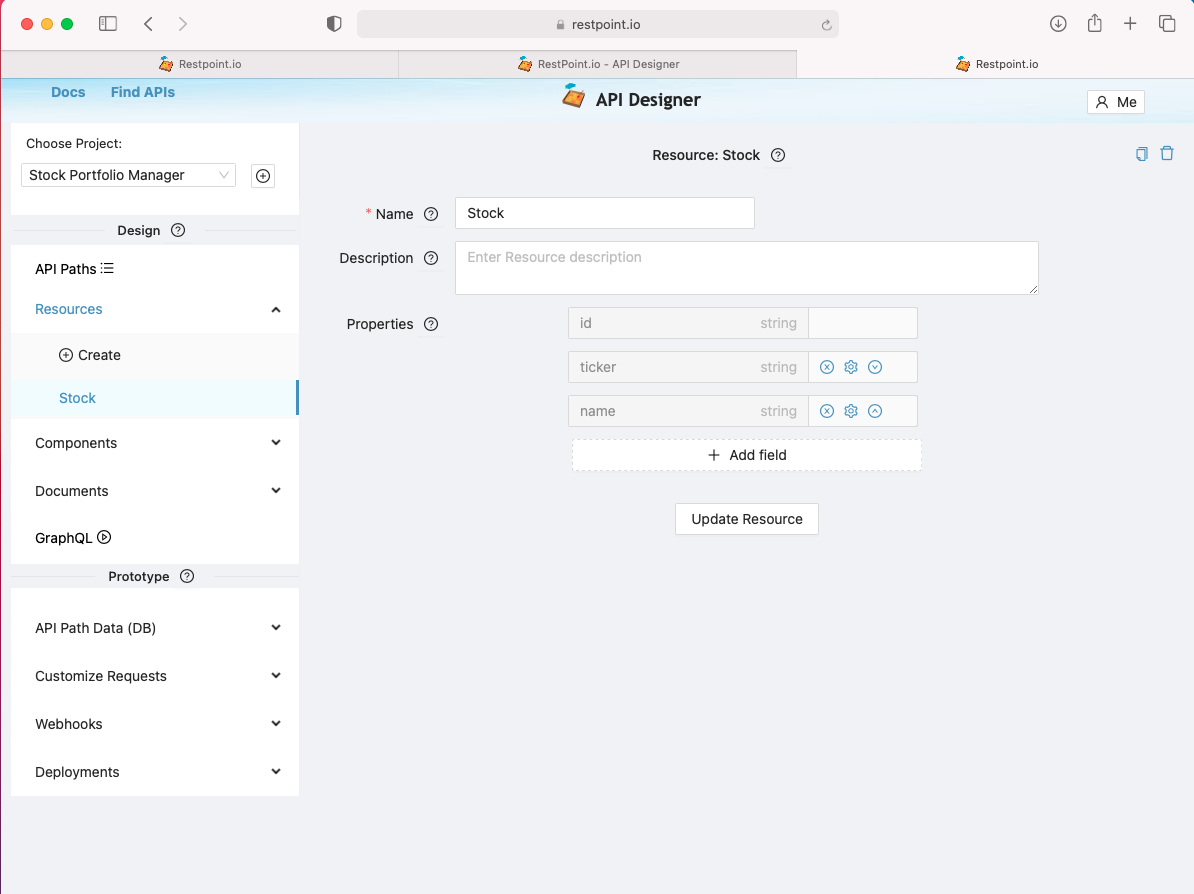
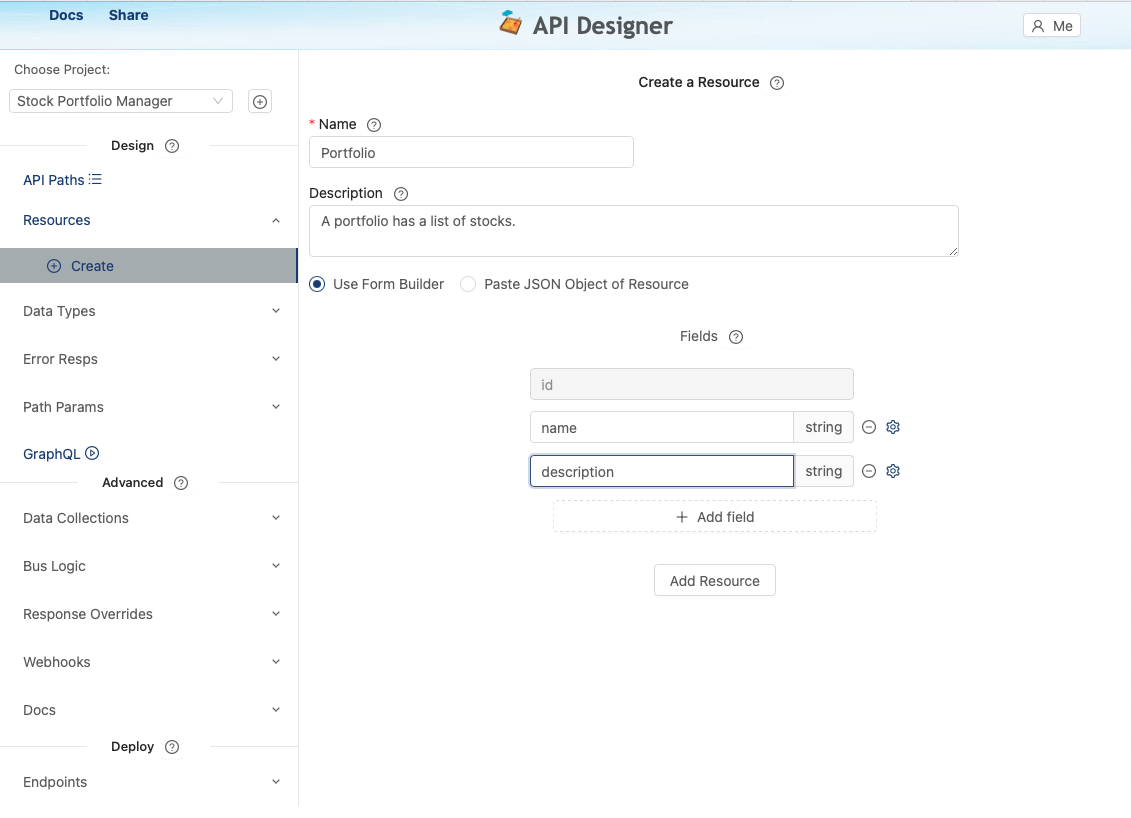
If you'd like to avoid hard coding JSON responses for each action, you can create a Resource Component then assign the component to the path. Then, all actions will automatically use the schema of the Resource component.
To create a resource, click on the left navigation and select the Components and Resource. Then configure a Resource.
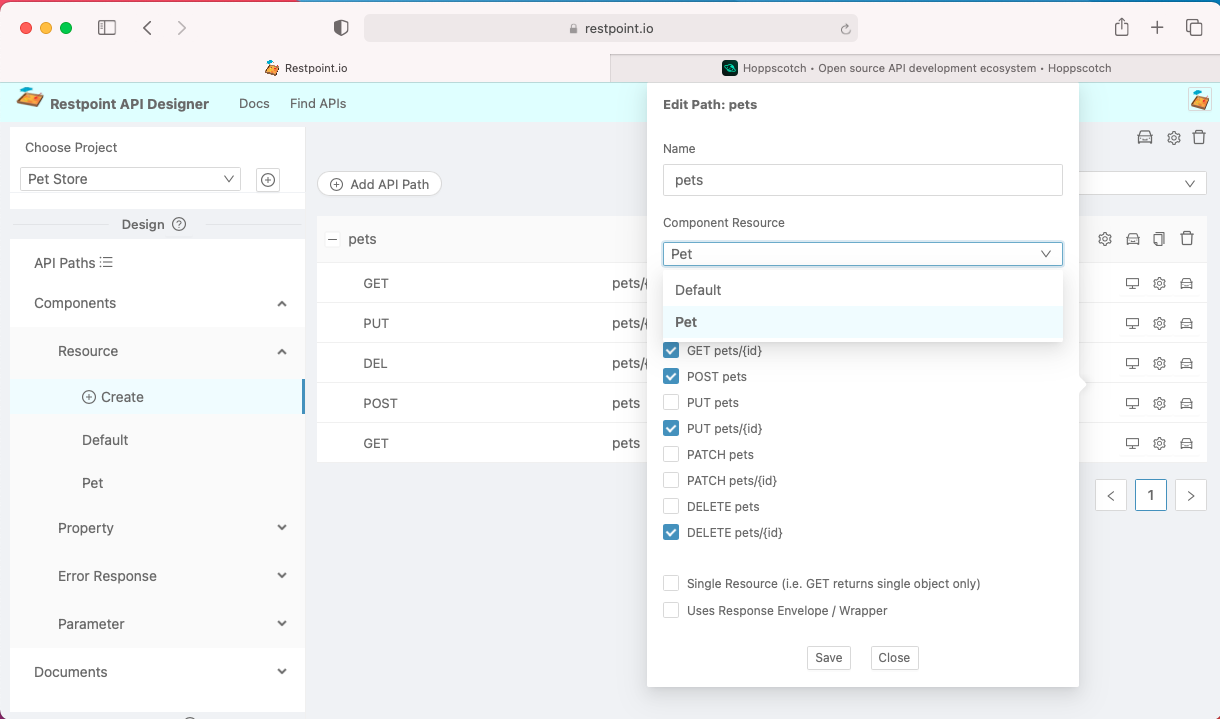
After creating the resource, click on API Paths and click on the gear icon for the path you wish to assign the component resource you just created.
4. Test Drive API Actions
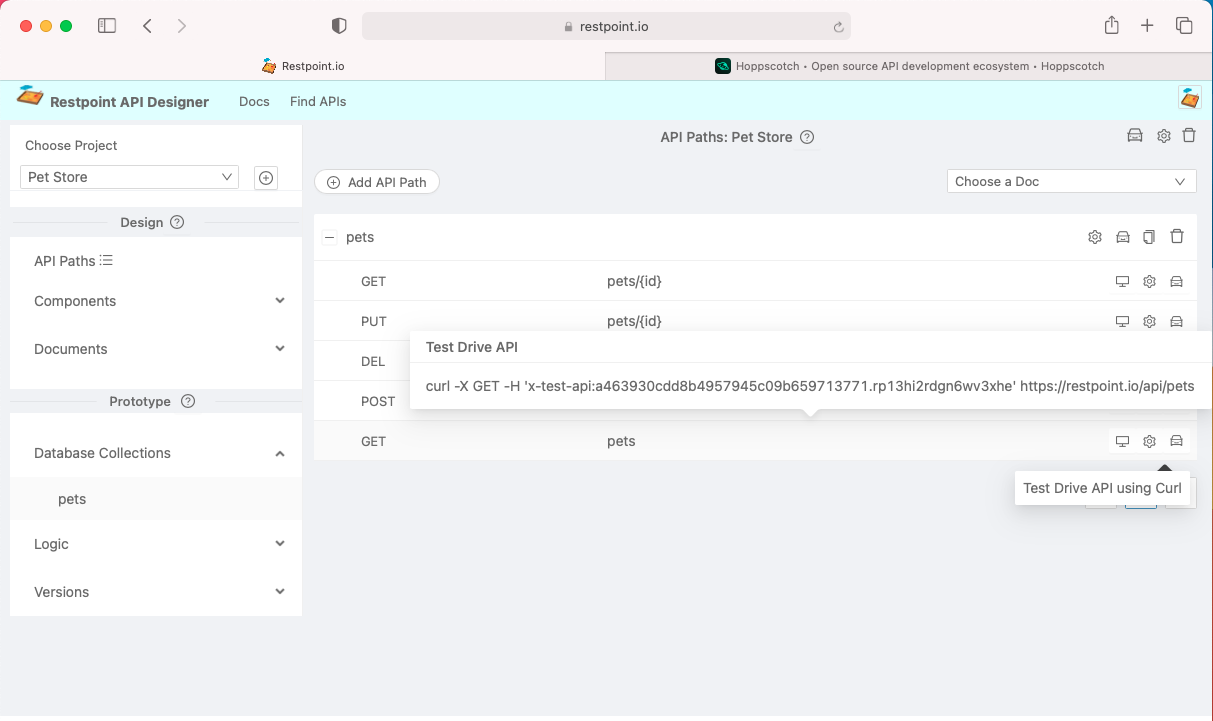
Look for the car icon to test drive your API. Click on API Paths, then expand a path, you will see a car icon, that is the curl example that you can execute to test the API request.
The car icon on the top right of the project view will pop up a window to enable the user to use SwaggerUI to test API calls. In SwaggeUI, expand any of the API paths, see the Try it Out button and click to execute the path, the response will show in the page.
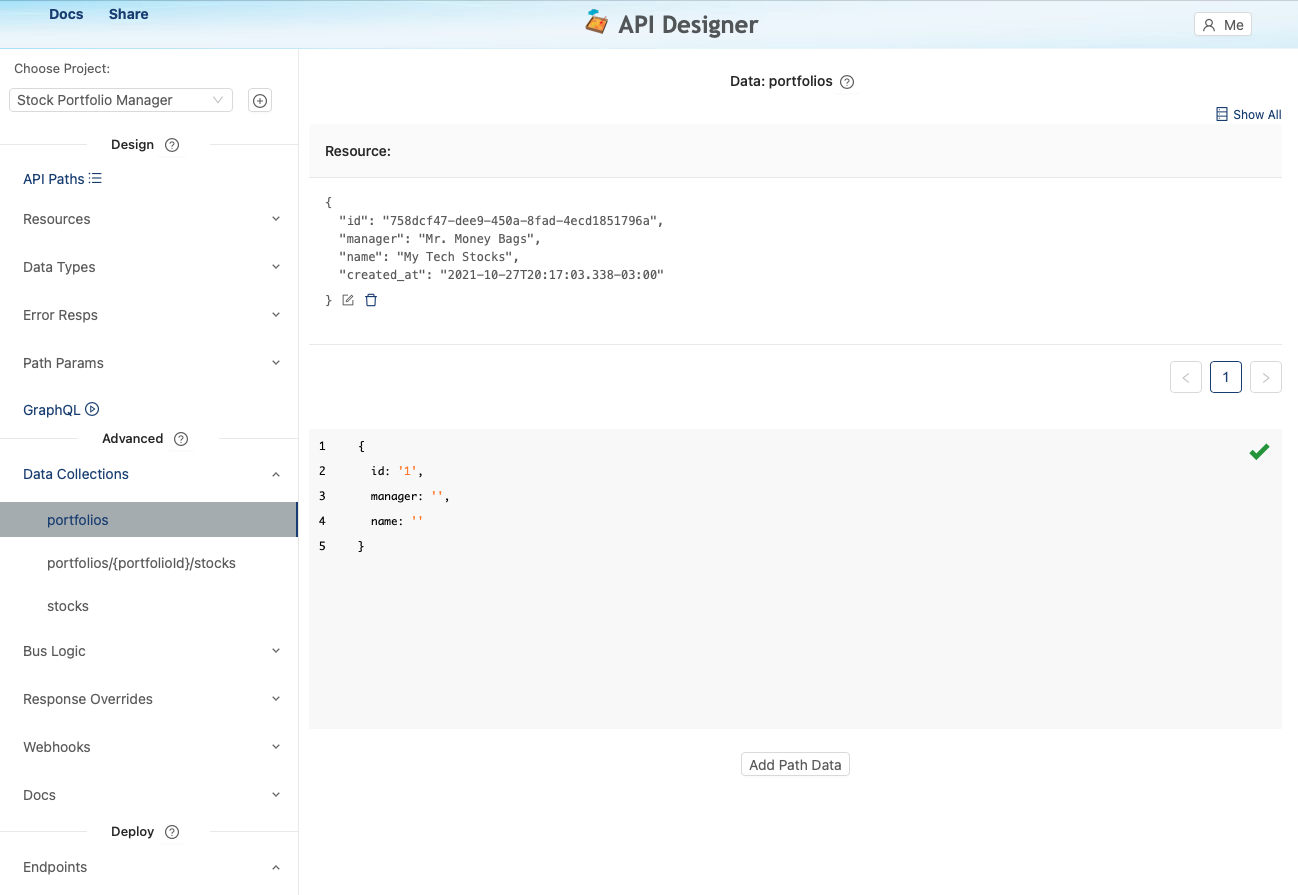
5. Data Collections
When a project is created, an embedded database is created for the project. And for each API path created, a data table is created seamlessly for the path. For example, when an API path, like /pets is created, a data collection called pets will be created and data objects can be added, edited or removed for that collection in the Data Collections section.
6. Resources with Property Components
Often your resource has a property that is a collection of properties, such as a Customer resource may have a property called Address, which may have street, city and zipcode properties. These objects are referred to as Property Components. These objects differ from Resources as Property Components cannot be assigned to paths. Property Components are reusable objects used to describe properties in Resources or other Property Components as well.
Resource and Property Components can be created using the Form builder or a JSON object can be pasted in the the provided text area. At any time a Resource or Property Components can be edited.
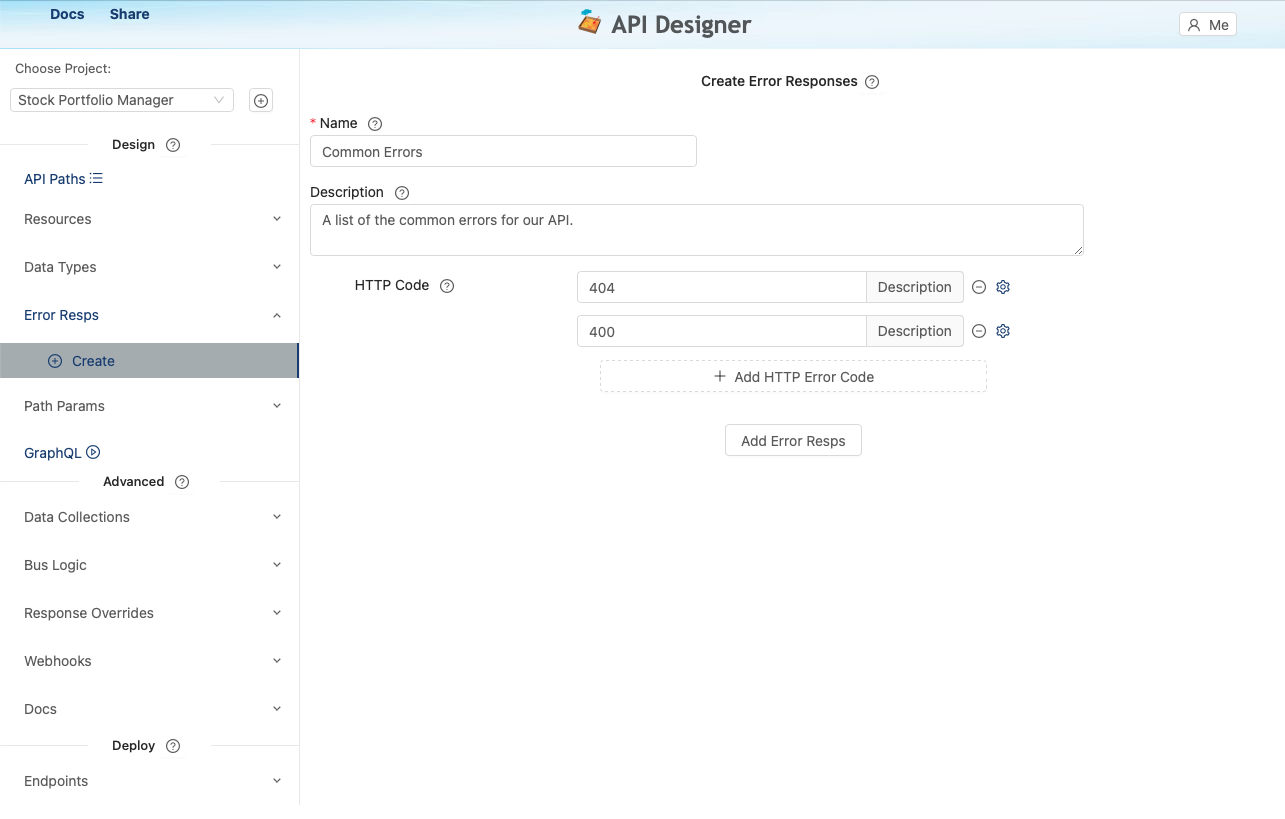
7. Error Responses
Default error responses are provided so you do not have to create any error responses right away. As you design your API and it comes time to customize your error responses, you'll click on Components on the left navigation, then Error Response, then create an Error Response, and configure the error code and message.
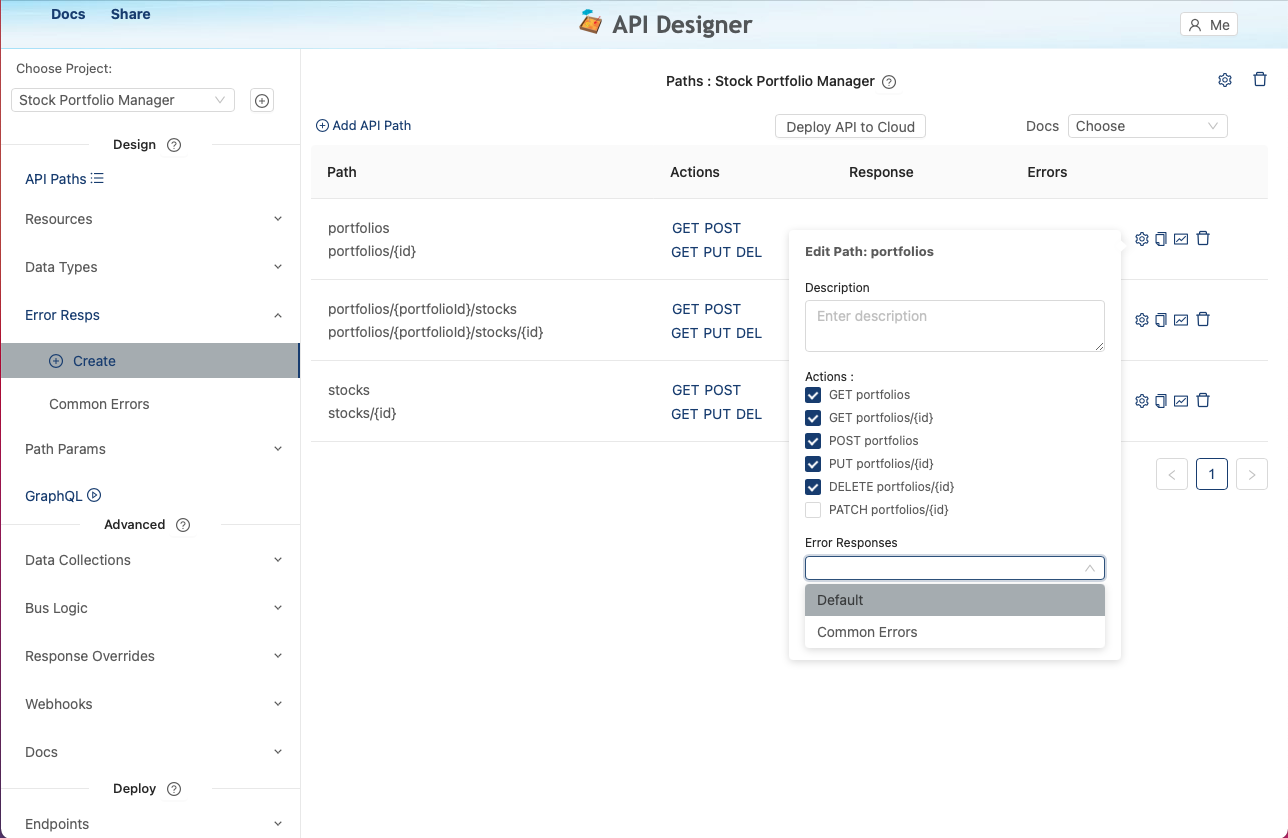
After you have configured error messages, go to your API paths page and select a path, select the gear icon for one of the actions you wish to assign the error messages to and select the error messages.
These error responses will override system provided error messages when you make requests on your deployed API backend prototype.
Error Responses can also be added to Action configuration. For example, click on GET or POST for a path and assign a Error Response. This enables generic error messages to be applied to specific actions while error messages applying to all actions can applied to the Path configuration.
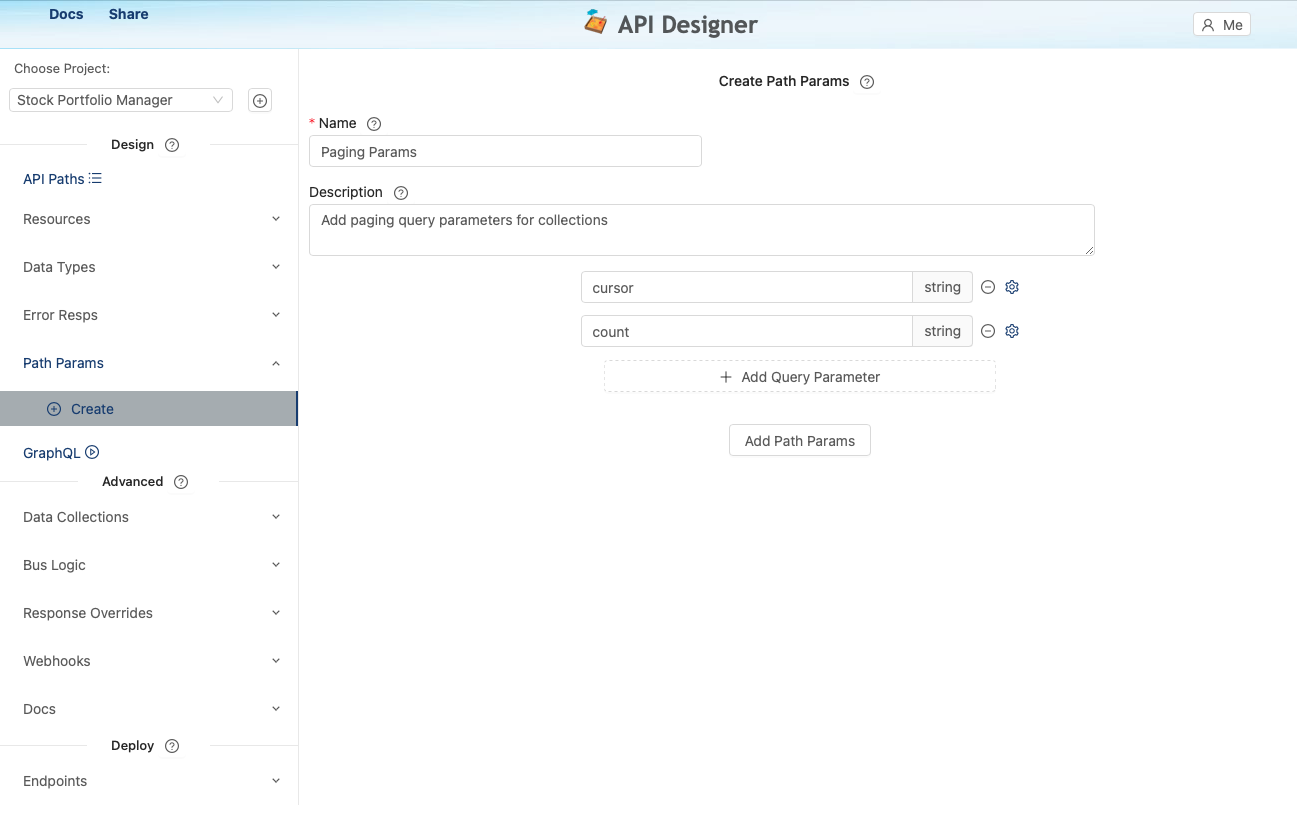
8. Query Parameters
Query parameters are configured in a similar manner as error responses. Configure the path parameters by clicking on Components on the left navigation, then Parameter and create Query Parameter and add the path parameter properties.
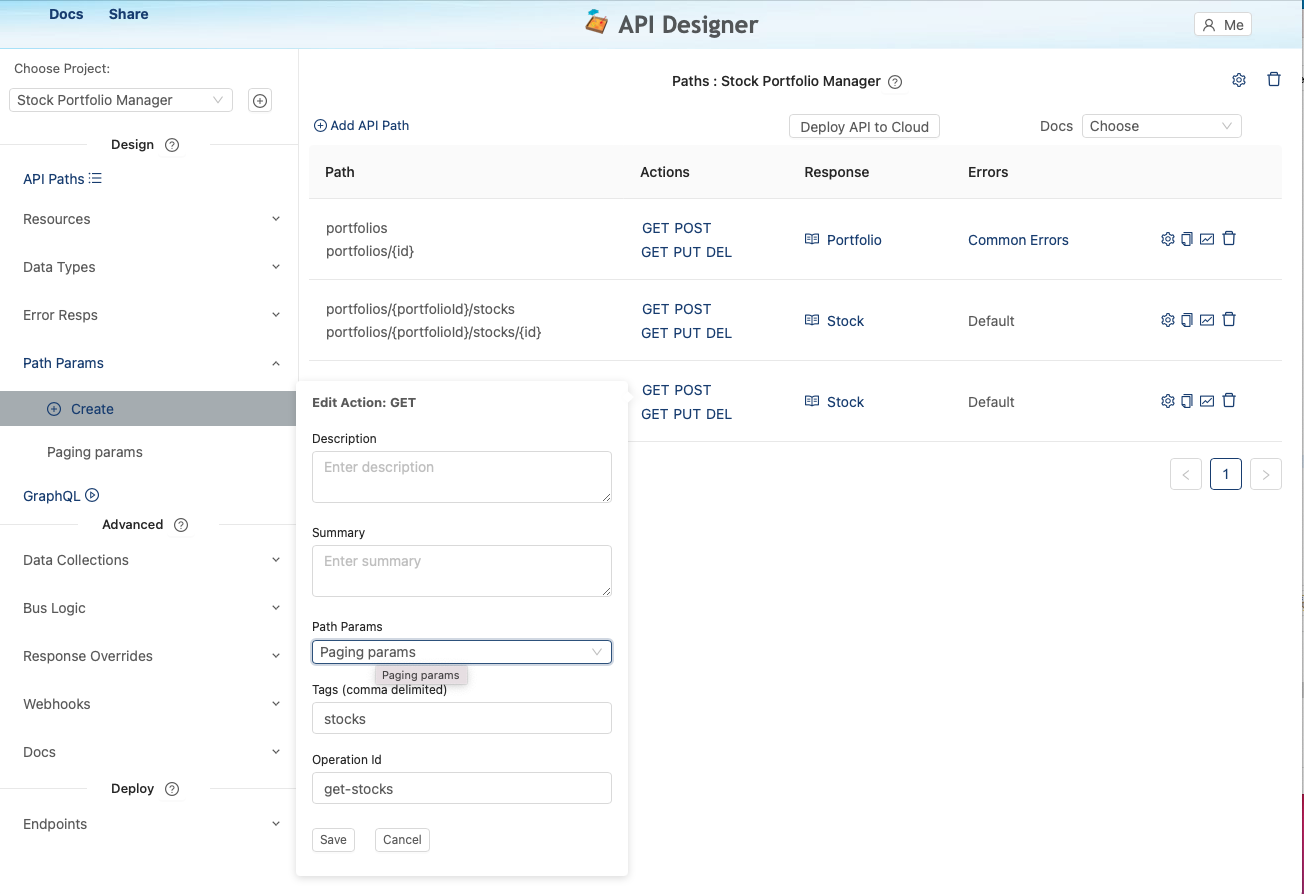
Now to assign the query parameters, go the API Paths page and select an Action for the path, such as GET. A window will pop up for you to assign the query parameters to this path action.
9. Adding Script
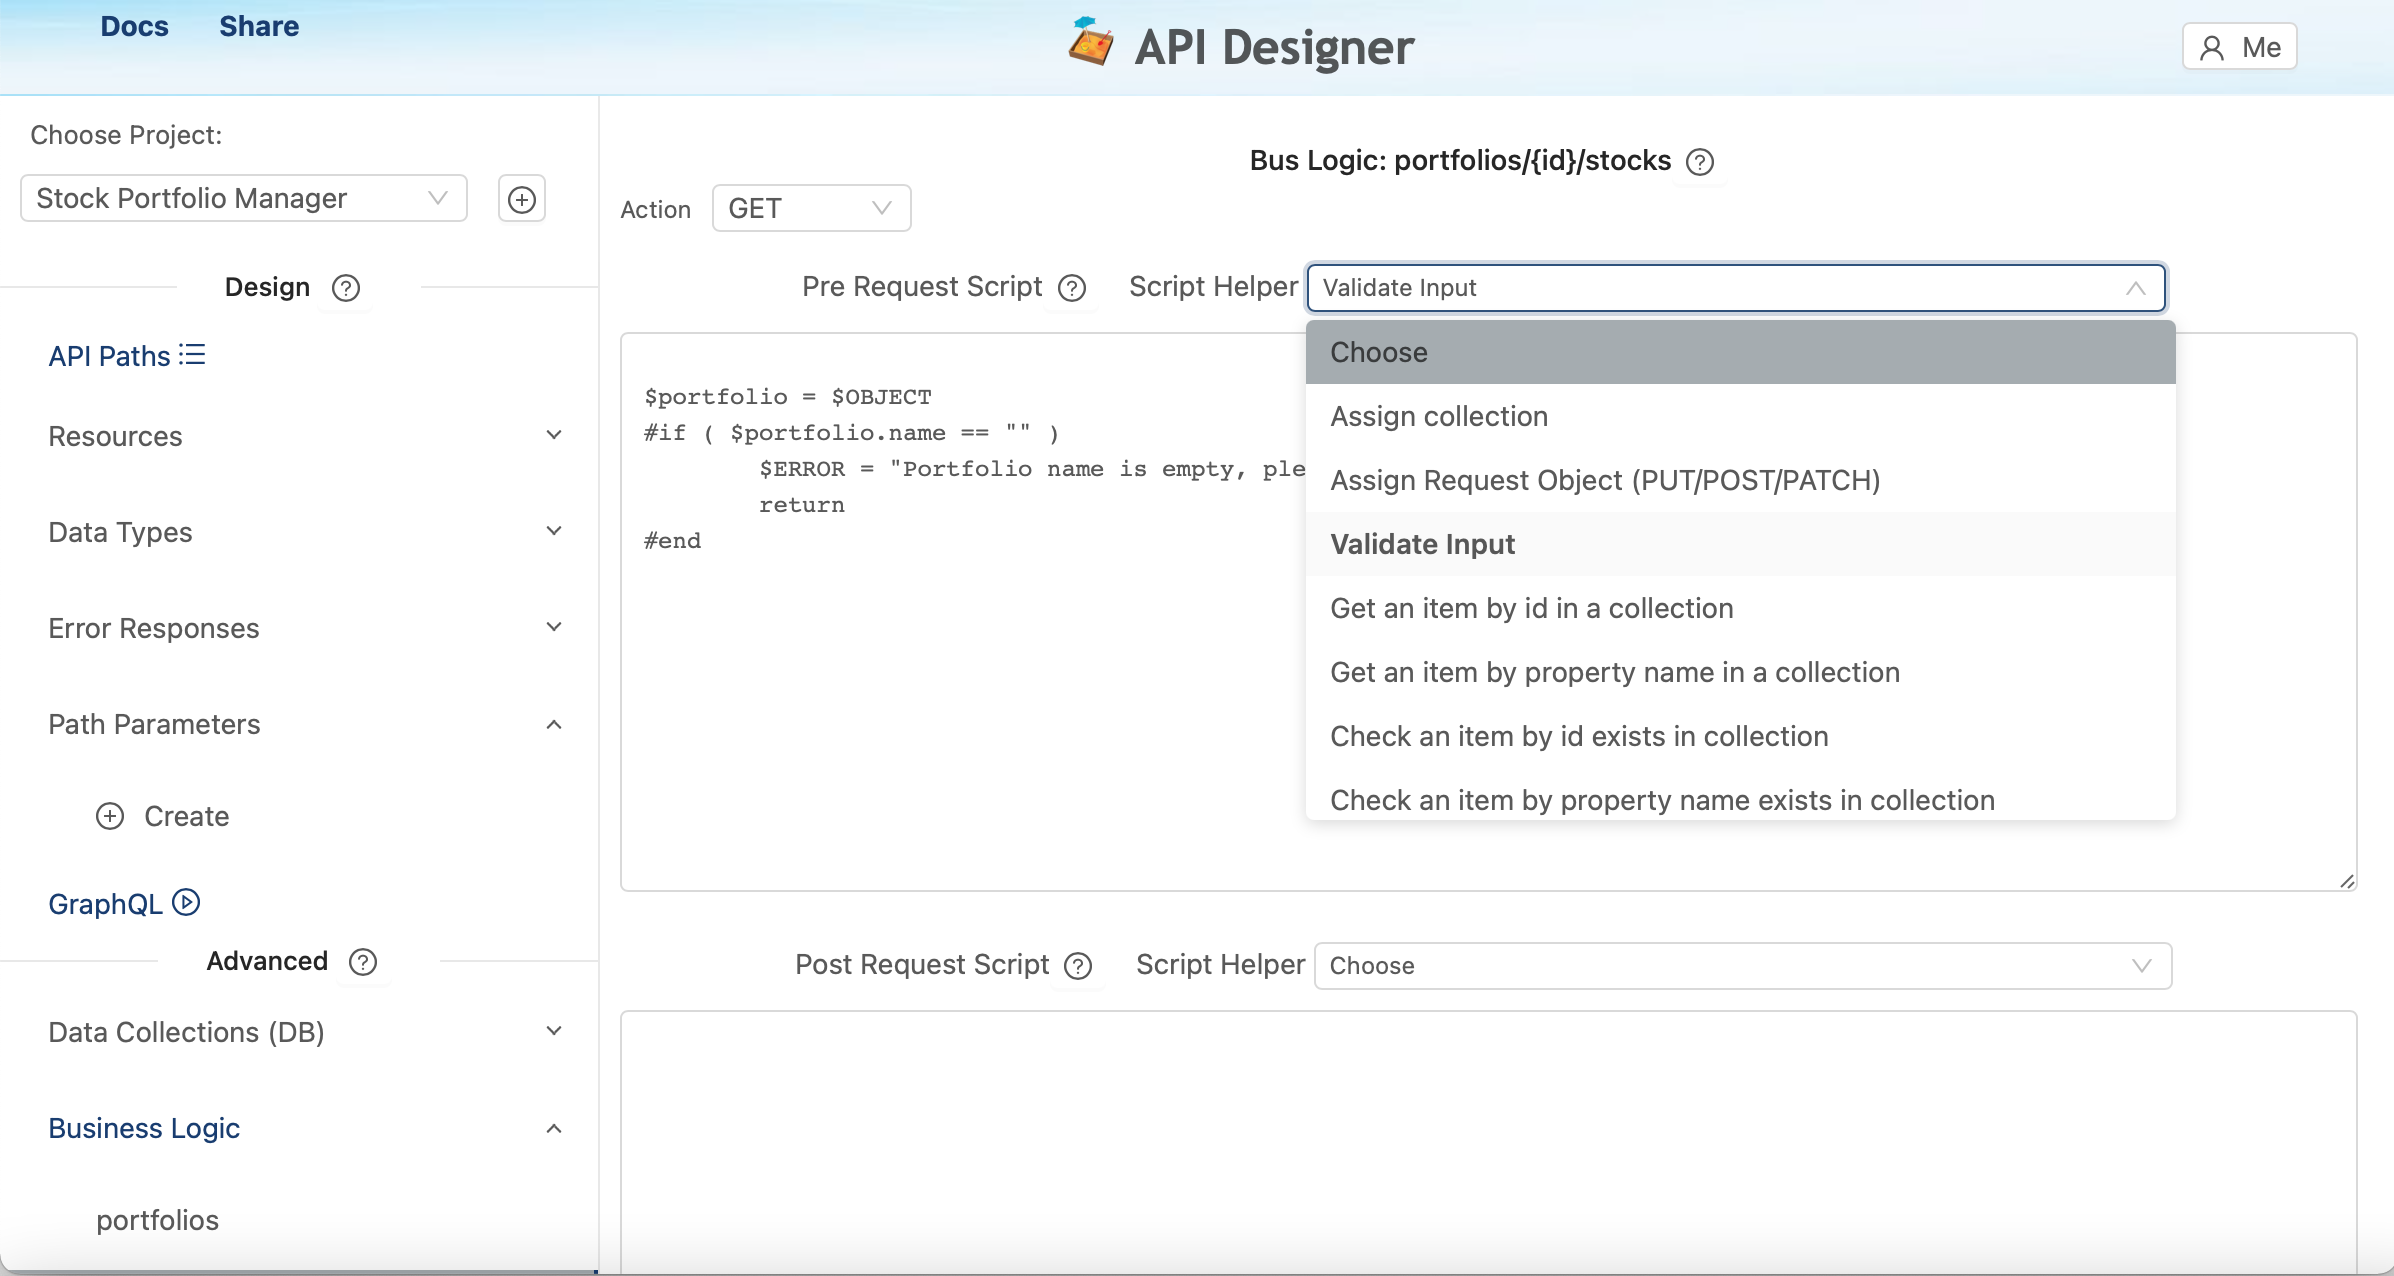
Prototypes can get very realistic when script or business logic is applied. When API requests are sent, pre and post request scripts can be configured to execute. This logic can be used for such actions as validation of input, checking if specific data is already in a collection, etc. The scripting is based on Apache Velocity, more info on the scripting can be found at https://velocity.apache.org/engine/2.3/user-guide.html#references
For example, when a POST request is sent, the Pre Request Script is executed before the object is added to the collection. After the object is added to the collection, the Post Request script is executed. See the Examples select list provided to help you design script, click on an item in the select list, you can browser then copy/paste or click to insert script into the text area.
The following is an example pre request script when adding a stock to a portfolio:
## add to list of stocks if not there
#if ( $REQUEST_OBJECT.id == "" )
     $ERROR = "Please provide the id of the stock to add"
#end

## a stock must exist in the /stocks collection to be added to a portfolio
#set ( $stocks = $PATHS.get_path("stocks").get_collection() )
#if ( !$stocks.has_object($REQUEST_OBJECT.id) )
    $ERROR = "Could not find stock with id: $REQUEST_OBJECT.id"
#end
The following is an example post request script to send a Slack alert when a portfolio was created:
## send a message to Slack when a portfolio is created
#set ( $resp = $WEBHOOKS.get_webhook("slack").post() )
#if ( ! $resp.success() )
   $ERROR = $resp.get_error()
#end
The following is an example post pre request script that returns a no longer supported api request message. "simple" is the Error Resp name, "410" is the error code defined in the Error Resp.
$ERROR = $ERROR_RESPS.get_http_code("simple","410")
A script has the following system objects available:
| Name | Description | Functions |
|---|---|---|
| $PATHS | All Paths | get_paths(), get_path("name") |
| $PATH | Target path | get_name(), get_collections(), get_collection("name") |
| $COLLECTION | Target collection | get_name(), get_object(id), get_object(object), get_objects(), create_object(id), add_object(object), update_object(object), delete_object(object), has_object(id), has_object_with("property_name", value), get_object_with("property_name"", value) |
| $REQUEST_OBJECT | Request object | has_value("name"), get("name"), put("name", "value"), has("name"), toJSON() |
| $OBJECT | Target object Note: $OBJECT.name is same as $OBJECT.get("name") | has_value("name"), get("name"), put("name", "value"), has("name"), toJSON() |
| $ACTION | Action | No functions, is a string i.e. "GET", "CREATE", "PUT", "DELETE") |
| $WEBHOOK | Webhook | post(), post($JSON) |
| $WEBHOOKS | All Webhooks | get_webhook("name") |
| $ERROR_RESPS | All Error Resps | get_http_code("error resp name", "error code"), has_http_code("error resp name", "error code") |
| $JSON | JSON (used for webhooks) | get("name"), put("name", value), create(), create("{ }") |
| $HTTP_REQUEST | HTTP Request | get_parameter("name"), has_parameter("name"), get_header("name"), has_header("name"), get_attribute("name"), set_attribute("name"), has_attribute("name") |
| $LOGGER | Logs are shown when errors occur | log("message") |
| $ERROR | Return error if $ERROR assigned a value | $ERROR = "Could not find object" |
For custom error codes, use scripting to return customer error codes in conditional logic. For example, if GET /customers is no longer supported, enter the following in the Pre Request script for GET:
$ERROR = $ERROR_RESPS.get_http_code("simple","410")
Note the first parameter ("simple") is the Error Resp name, the secondar parameter ("410") is the http code created in the "simple" Error Resp;
10. Webhooks
Webhooks are used to POST information to external webhooks. For example, to configure a Slack webhook, enter the name and description, then external webhook URL and headers. Headers are colon separated and comma delimted, for example, to add two header values: query:yes, add:no. See the following:
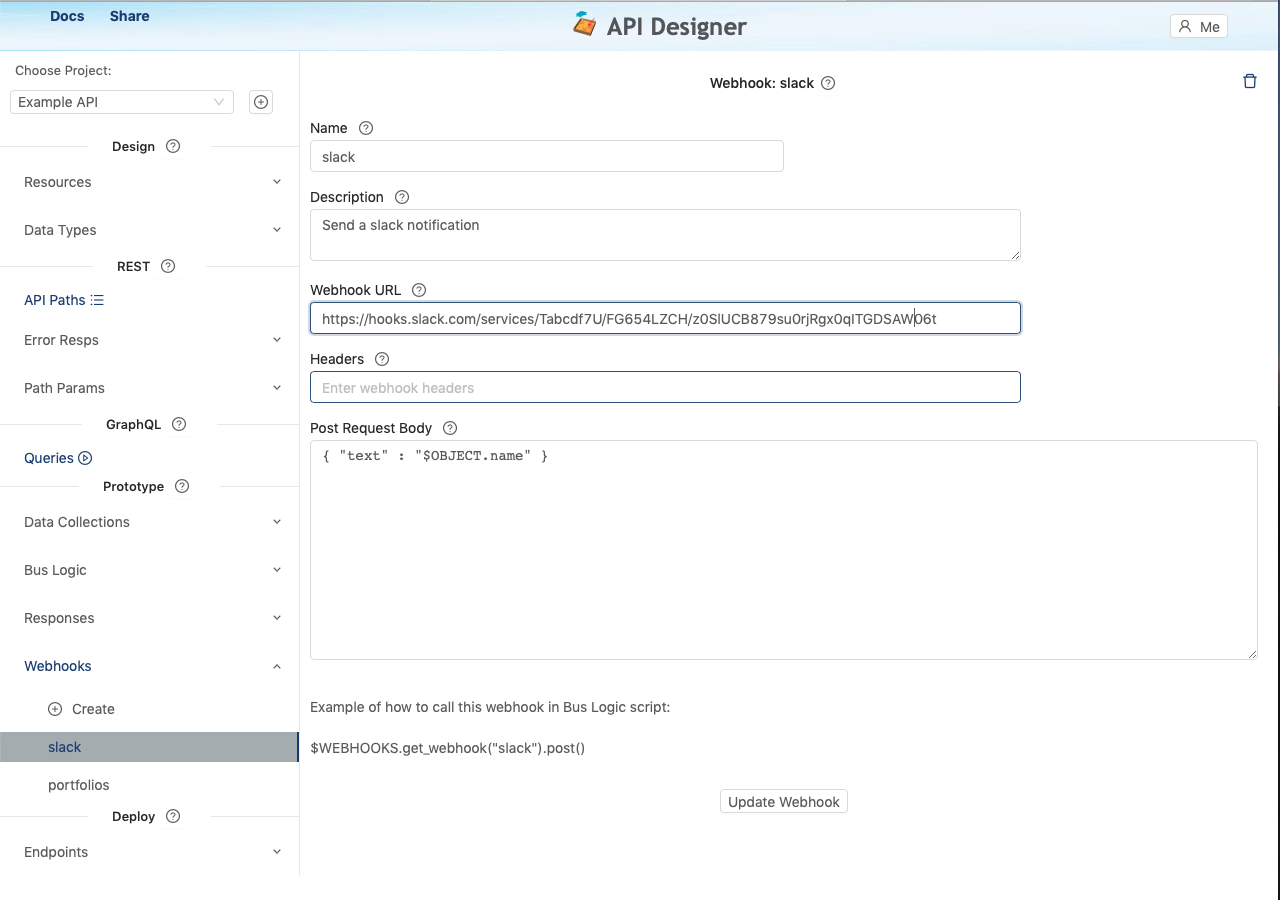
After the webhook is configured, webhooks can be execute in scripts. To execute the Slack webhook that we just configured in a script would be would as follows:
$WEBHOOKS.get_webhook("slack").post()
For more advanced webhooks, you also have the option to create the JSON. $JSON is a handy utility to create JSON for webhooks. To add a nested JSON object would be: $data = $JSON.create().put("firstname", "JohnDoe").put("lastname", "Doe") $JSON.put("text", "test").put("data", $data) $ $WEBHOOKS.get_webhook("test").post($JSON)
11. Documents
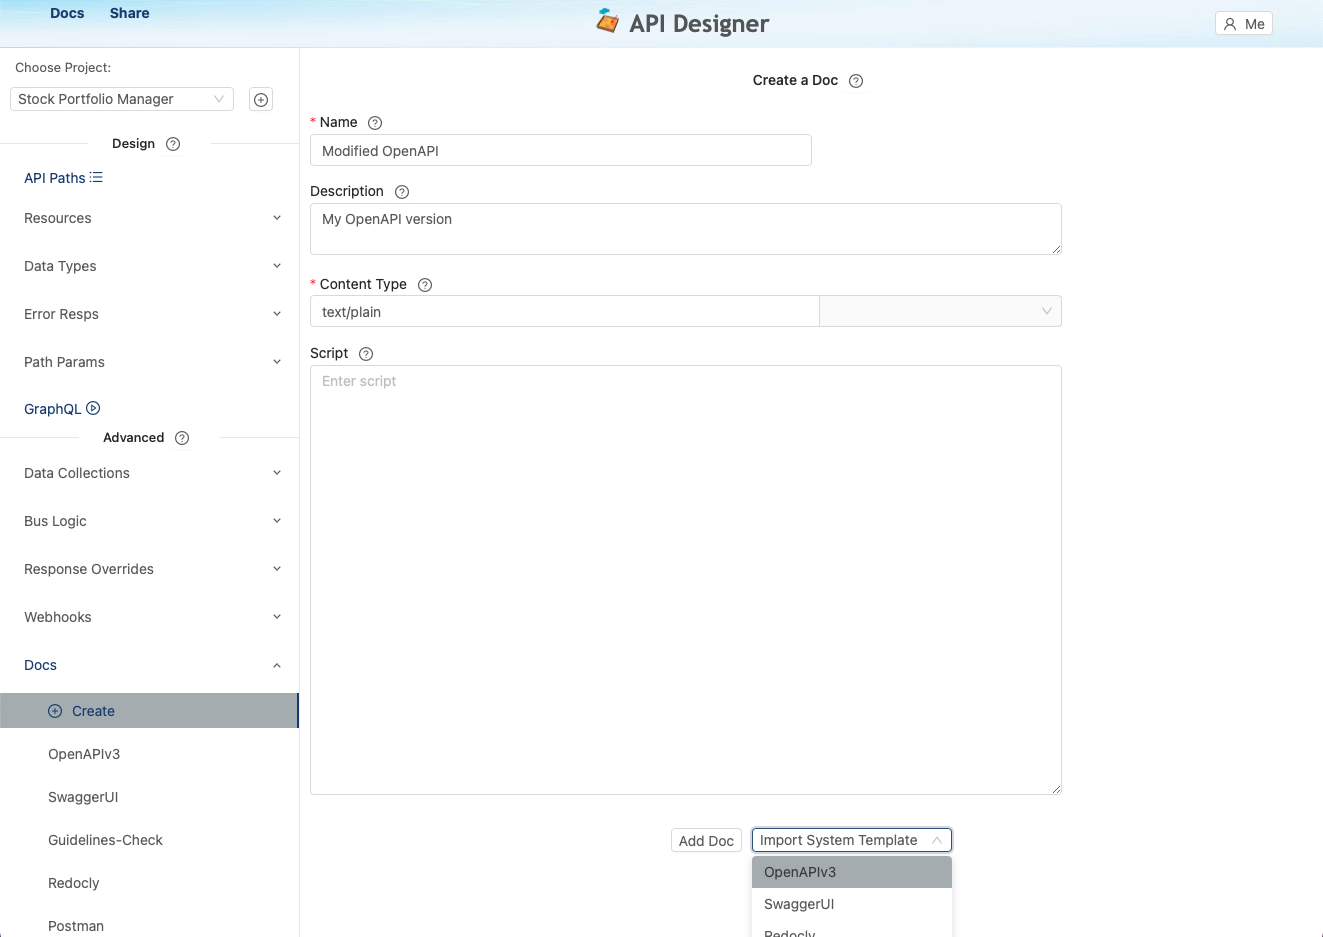
Many documents are provided by default or you can create your own documents. The easiest way to create your own documents is to create a doc and import the system doc as a starting point and then make the changes you need. For example, if you wanted to create your own modified OpenAPI document, you would click to create a new document, then import the system doc called OpenAPIv3.
Documents provided by default are:
OpenAPI: Auto generates OpenAPI v3
SwaggerUI: Generates the web page to view your API in SwaggerUI
Redocly: Generates the web page to view your API in SwaggerUI
Postman Collection: Auto generates a Postman collection to send requests to your prototype
Guidelines Check: Generates a PDF of the issues that break the default API Guidelines
Design Review: Generates a PDF of the default Design Review doc
12. Versions
Once you have designed resources, paths and added data, you can now save those Paths as Versions. This "locks in" all aspects of the API for the user and for external users to continue to send API requests.
To save a Version, configure the name, base path and select the paths. The base path is used for the deployed URL, typically, /api. Versions are self contained deployments so multiple versions can deployed simultaneously as you iterate towards completion.
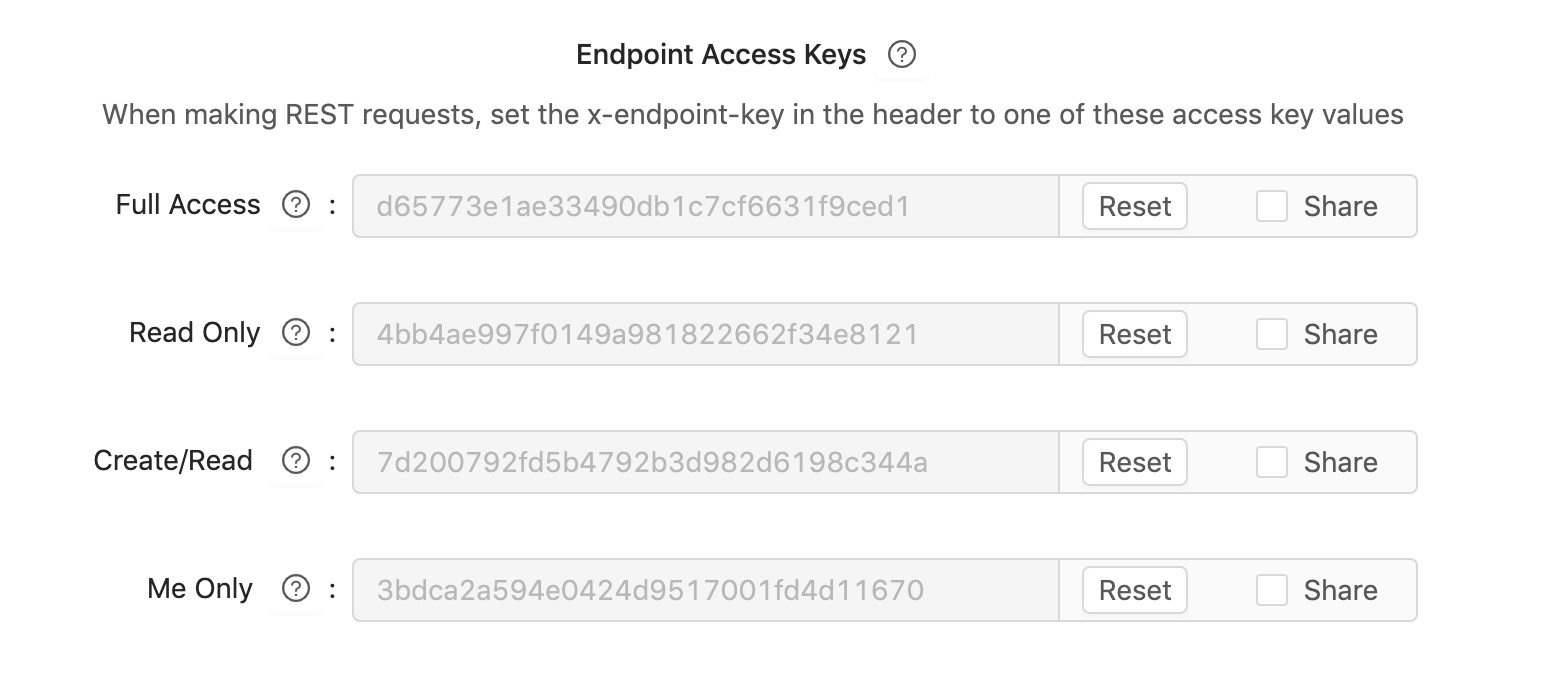
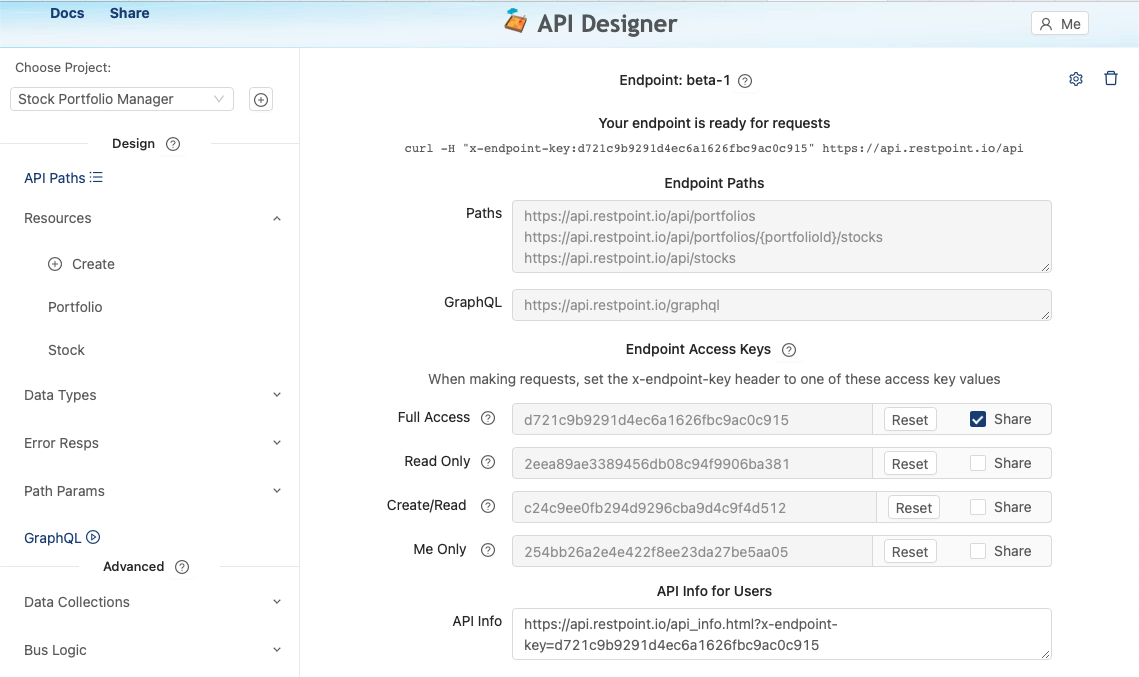
Access keys are provided for users to connect to your Versions using the x-version-key header - full access, read access and create/read only. Using the full access key provides full read and write access to all items, using the read access keys provides read access to all data, the create/read key provides create and read access.
13. Share API's
Click shared on the Version so anyone can find your shared API by searching on your user name on Find API's. See Find API's at the top left on the page in the API Designer.