
Design Your First API Prototype in 5 mins
Let's build a Pet Store API using Restpoint API Designer UI for any user to test drive over the web.
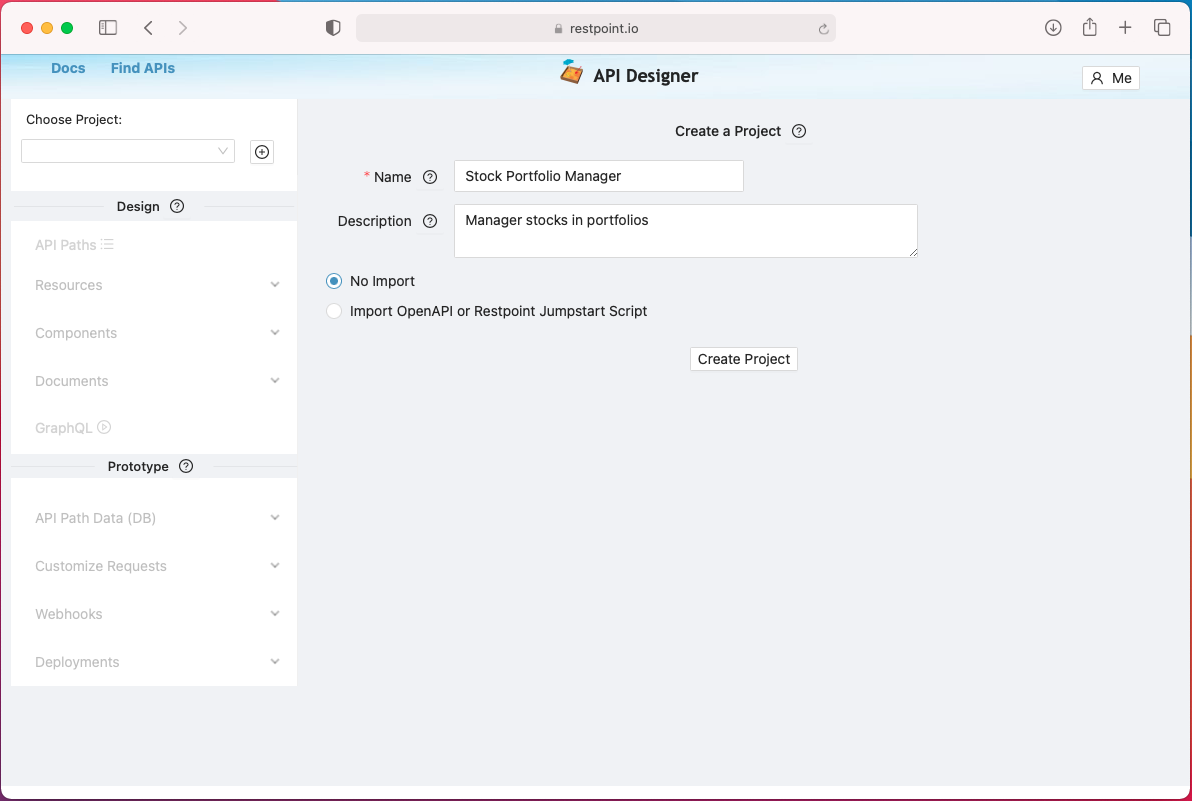
Step 1: Create a Project
After you log in, first create an API project by clicking on the "+" button beside the Choose Project select box,
enter the project name & description on form on the the right side and click the Add Project button.
Step 2: Create API Path
Next create an API Path for /pets. Click on API Paths on left navigation, then click on the "Add API Buttton" button on the right and configure.
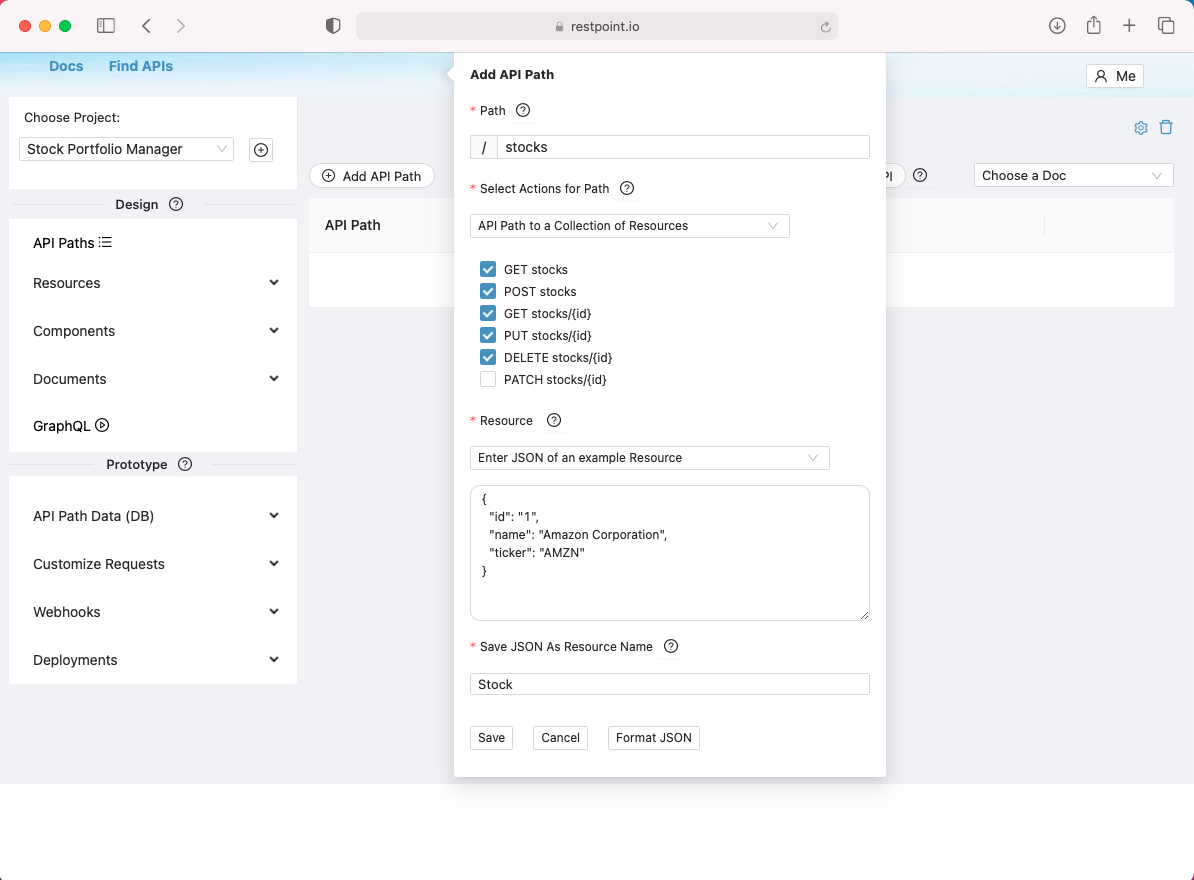
Enter the name of the path, i.e. pets (this will make the API url be /api/pets, so don't add /api)
Click on the HTTP Actions you need for this path, we'll configure more later.
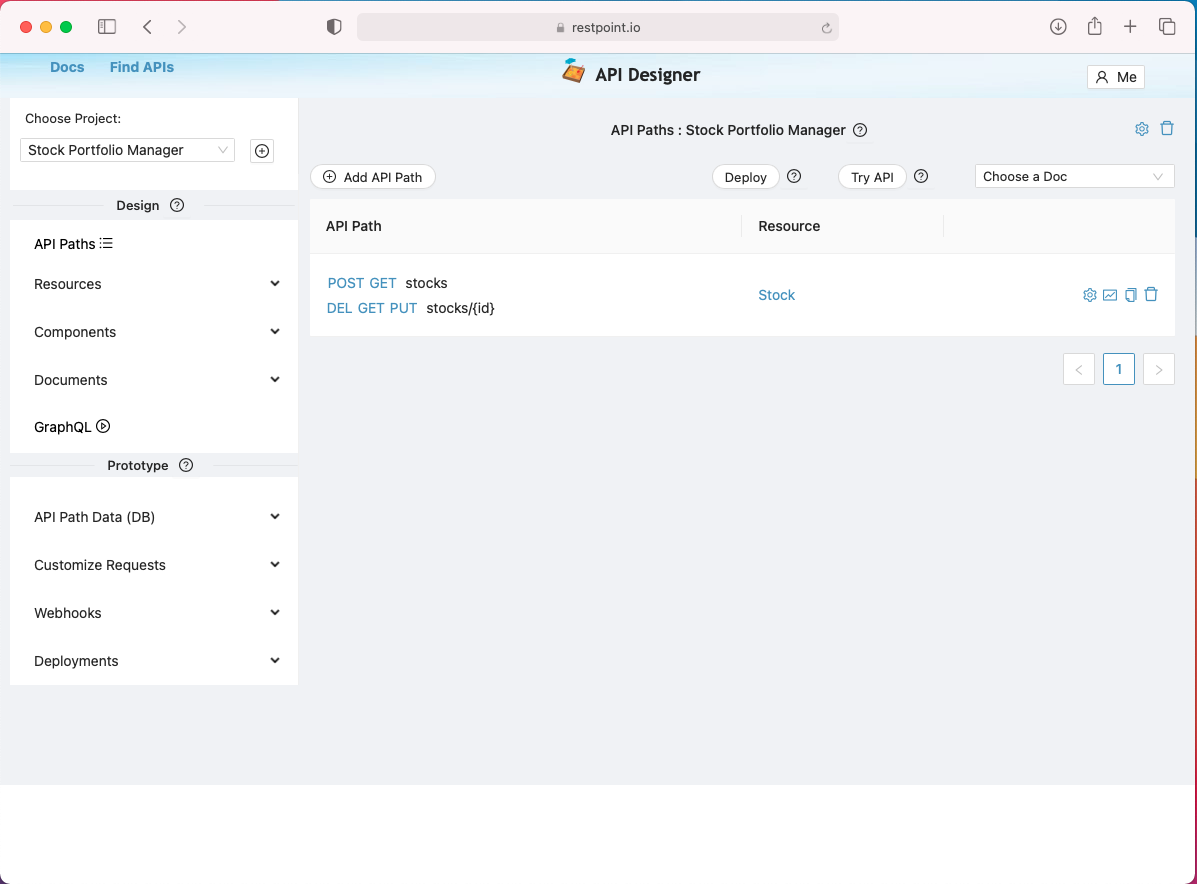
After creating your path, you will see the path in a the list.
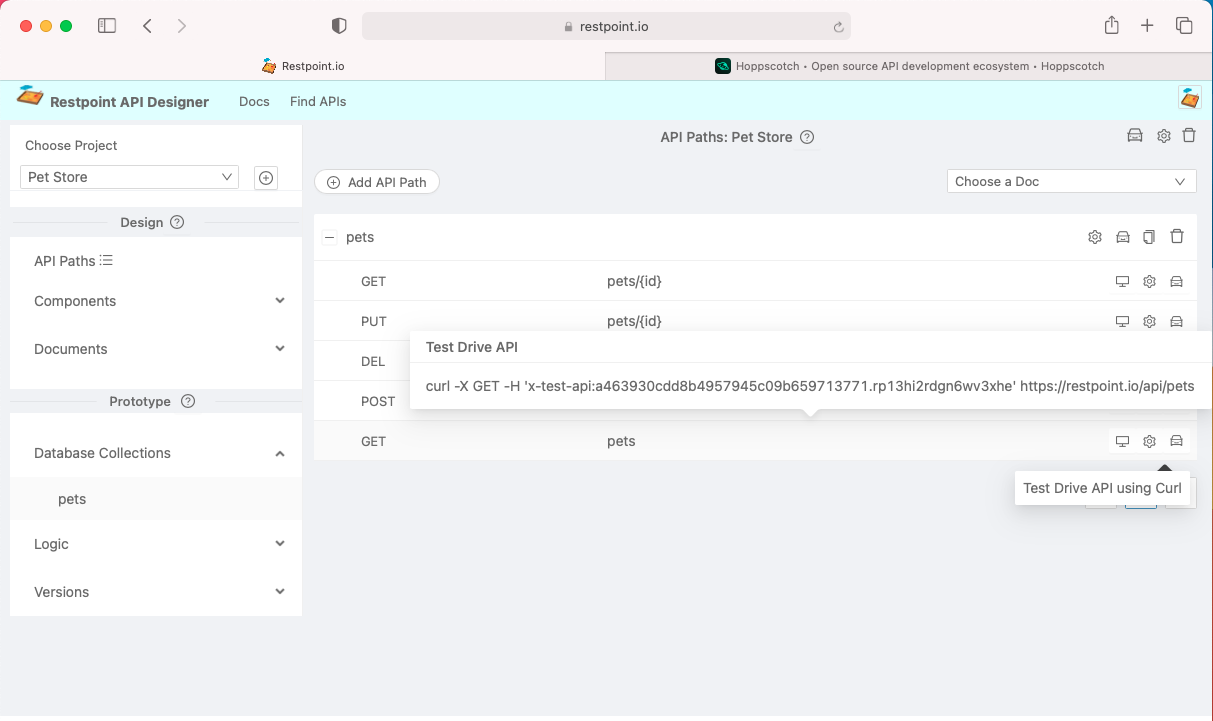
Step 3. Lets Test Drive our API
Click on API Paths, expand the pets path. Click on the screen icon on the right of the Get action and configure the response, for example, choose JSON and hard code a JSON response for Get action.
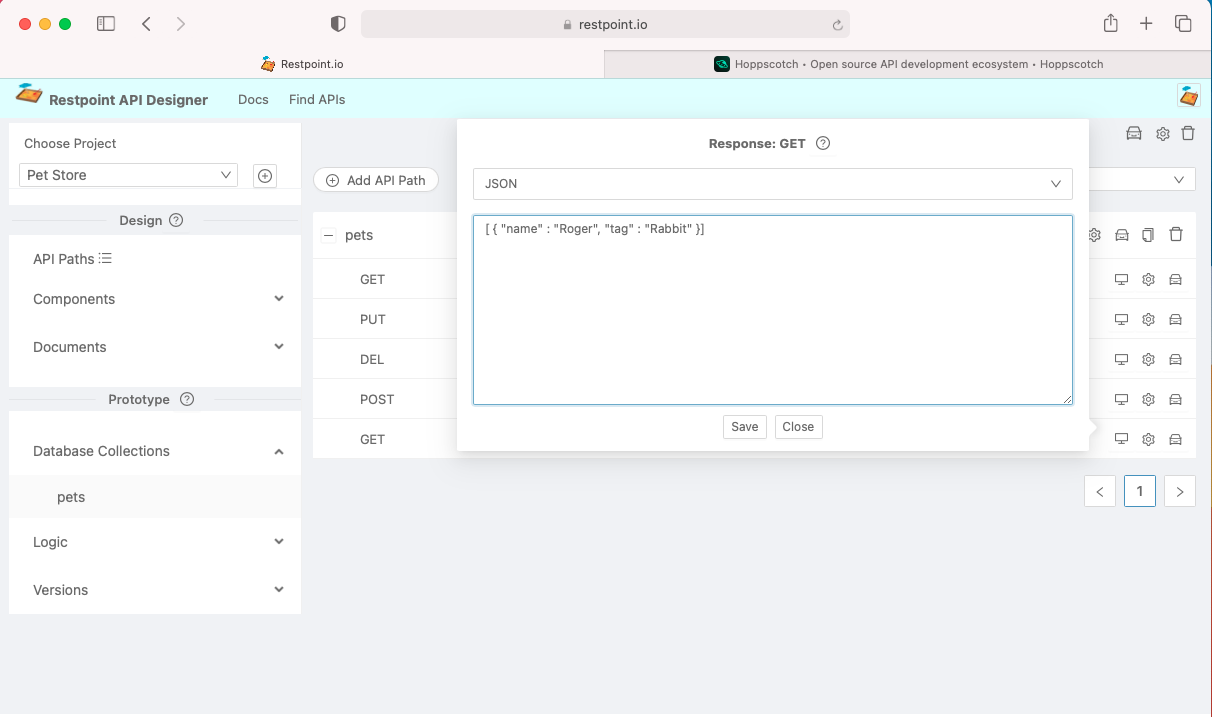
See the car icon on the right side that will pop up a curl example to test drive.
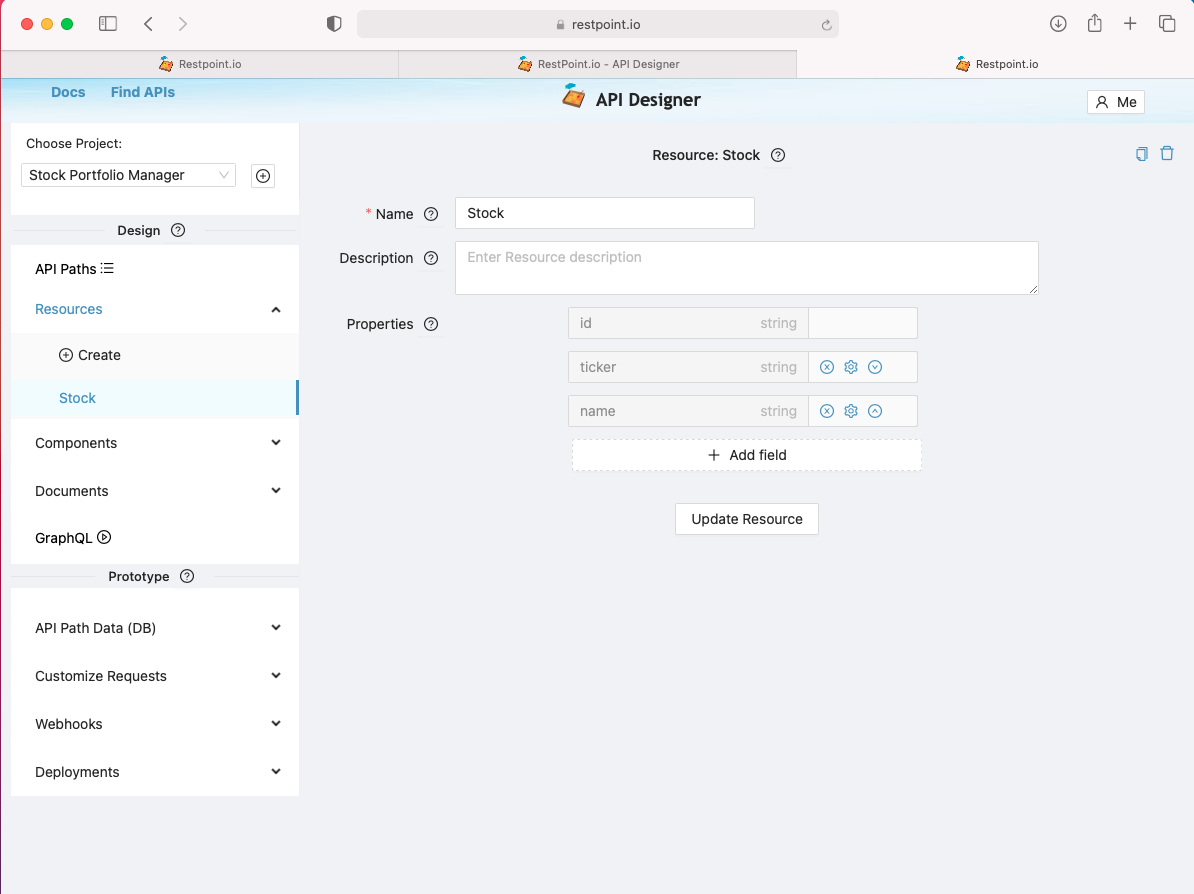
The tedious task with mocking tools is hard coding all the responses for all actions. With Restpoint, you don't have this hassle. Instead, click on Components on the left navigation, choose Resource. Then create a Pet resource or meta data for a Pet.
Now assign the Pet resource to your /pets path. Click on API Paths on left navigation, click on the gear icon, configure Pet resource for this path.
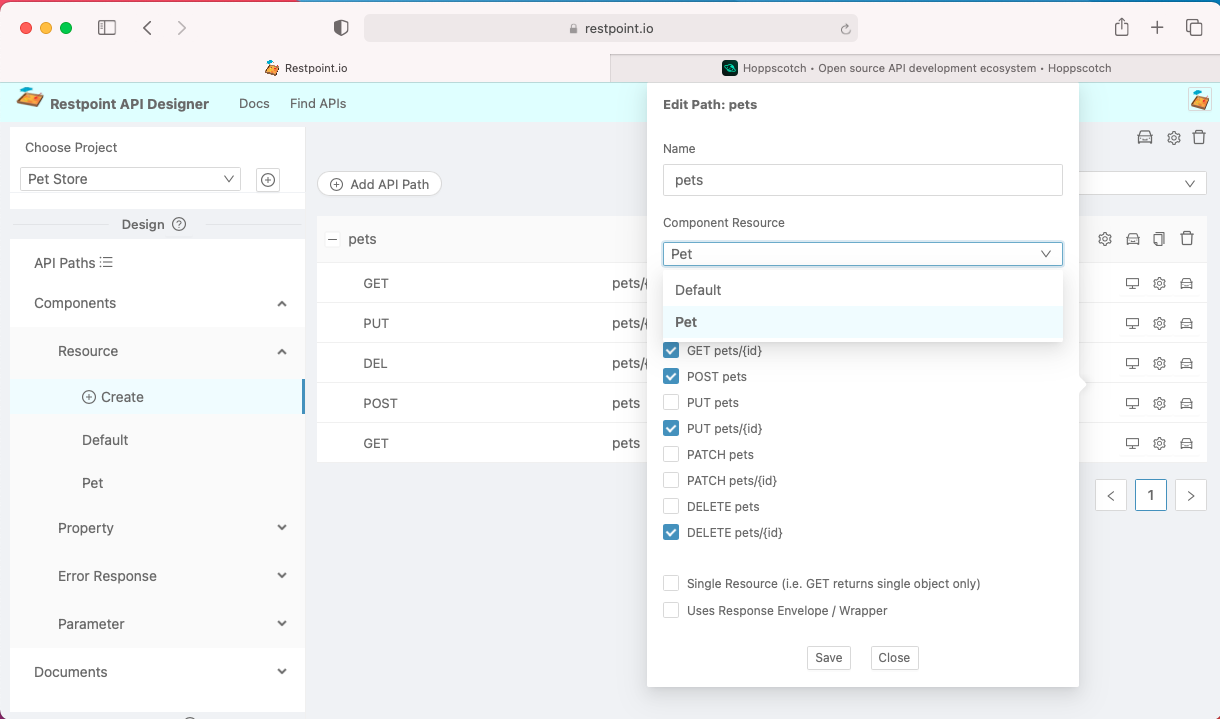
Now run your Get curl example again. Now try the curl command for the rest of the actions, i.e. Post, Delete, etc. You'll see your paths have now become a real working API with a database layer.